Vegetables
Set The Table From Your Garden
-
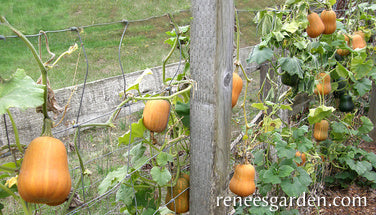
Baby Butternut Squash Honey Nut
BEST TO START OUTDOORS
Winter squash needs full sun, rich fertile soil and warm temperatures. Wait to plant until temperatures stay above 50°F (10°C) day and night. Sow groups of 2 to 3 seeds 2 feet apart and 1 inch deep in rows 4 feet apart. Thin to 1 strong seedling per group to give vines room to ramble or climb. Or make slightly mounded hills 2 to 3 feet across and 6 feet apart and plant 4 to 5 seeds in each hill. When seedlings have several sets of leaves, thin to the strongest 3 seedlings per hill.
GROWING NOTES
Protect young seedlings from marauding birds by covering with plastic berry baskets at sowing time, removing before plants get crowded. To save space, and make picking easy, Honey Nut vines can easily be trained up fences, trellises or teepees 4 to 6 feet tall.
HARVEST AND USE
All winter squashes need to mature properly, so wait to pick until rinds are fully colored up from dark green to orangey-tan and tough enough to resist piercing with a fingernail and vines have died back. Then cut, leaving a good stem handle. Let them cure for 10 days in the sun, then store in a cool dry place and they’ll keep for months. In the kitchen, cut Honey Nuts in half then bake until tender. Flesh is meltingly sweet and delicious.Regular price $4.39Sale price $4.39Unit price / per -
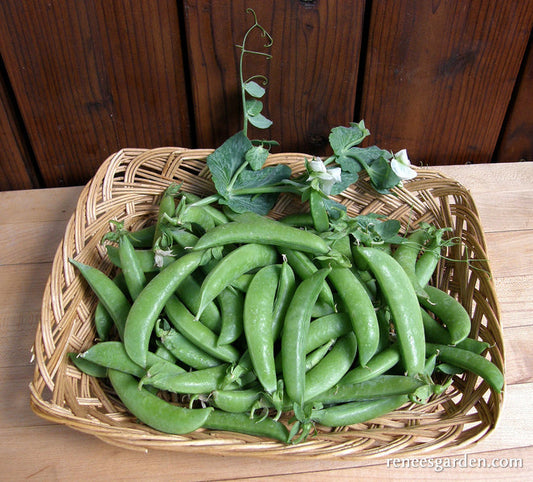
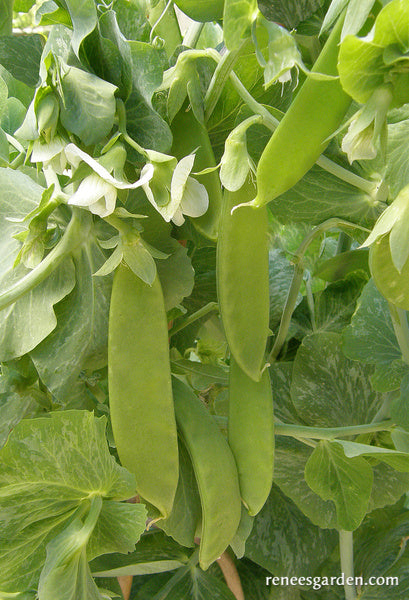
Snap Peas Sugar Daddy
START SEEDS OUTDOORS
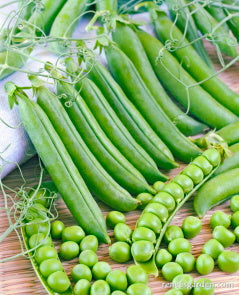
In early to mid-spring, plant peas in full sun in well-worked, fertile soil. Sow seeds 1 inch deep and 2 to 3 inches apart in wide rows or bands 3 inches across, spacing the wide rows 2 feet apart. Provide supports for these 2 1/2 to 3 foot vines at planting time. Protect from marauding birds with netting or floating row covers if necessary. Wet and cold early spring weather may affect germination so if first sowing doesn’t germinate evenly, replant right away as new seedlings catch up quickly. Sow again for a fall crop about 2 1/2 months before first expected fall frost.HARVEST AND USE
Harvest only when peas are mature and round in the thick walled, juicy pods for the best developed flavor. Savor their sweet crunch fresh from the garden (kids especially love them!) as a snack or slice into salads. To cook quickly, sauté in a little oil just until pods turn a deeper green color.GROWING NOTES
Use netting or wire trellis to support these heavy bearing vines for easy picking. Turn a sprinkling of bone meal and wood ashes into the soil before planting. Keep pea vines well weeded and watered and mulch to conserve moisture. Water at the base of the plants to avoid mildew.
Regular price $4.89Sale price $4.89Unit price / per -
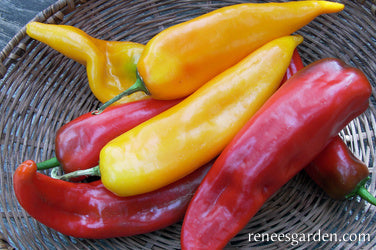
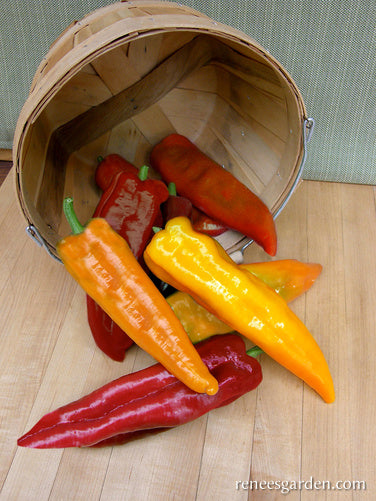
Italian Roasting Peppers Corno di Toro Mix
STARTING SEEDLINGS
In early spring, start indoors about 2 months before night temperatures stay above 50-55°F (10-13°C). Sow seeds 1/4 inch deep and 1 inch apart in a container of seed starting mix. Keep moist but not soggy, and very warm 80-85°F (27-29°C). Provide a strong light source until seedlings are ready to plant outside. When 2 inches tall, transplant 3 inches apart into deeper containers. Maintain at 70-75°F (21-24°C). Feed with half strength fertilizer every week until weather is warm enough to gradually acclimate seedlings to outdoor conditions. Transplant 2 feet apart into rich soil in full sun.
GROWING NOTES
Don’t transplant outdoors until nights are above 50°F (10°C). Prepare soil well with aged manure or compost. Plant only robust seedlings with well-developed roots. Mulch plants to maintain even soil moisture.
GROWING & HARVEST
Peppers need full sun at least 6 hours per day. Mulch well to maintain even moisture. Fertilize weekly to establish vigorous plants that provide shade and protect fruit from sunburn. Plants must be staked or caged to keep branches from breaking under their heavy fruit set. Harvest when fruits are glossy and turn from green to fully red or yellow by cutting, not pulling from plants. Eat fresh, roast or grill or try them Italian style, sautéed with tomatoes, olive oil, garlic and basil, accompanied by good hard cheese and crusty bread.
Regular price $3.69Sale price $3.69Unit price / per -
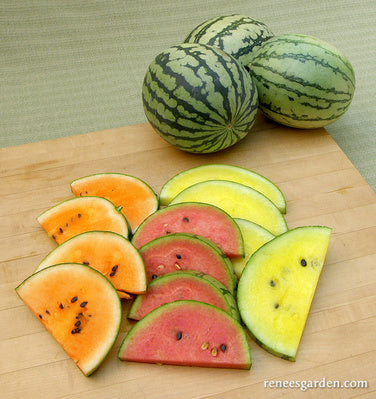
Icebox Watermelons Rainbow Sherbet
STARTING SEEDLINGS OUTDOORS
Melons need full sun, rich soil and warm temperatures. Plant only after night temperatures are above 55°F (13°C). Make slightly rounded hills 2 feet in diameter and 5 feet apart. Sow 5 or 6 seeds 1 inch deep in a small circle in top of each hill. When seedlings have several sets of leaves, Be Sure To thin to the 3 strongest plants in each hill.
TO START EARLY INDOORSNo more than several weeks before last frost date, sow seeds in individual pots of seed starting mix. Keep warm and moist, and provide a strong light source until weather warms enough to transplant outdoors (see above).
GROWING NOTESAmend soil well with aged manure or compost. If summers are short or cool, put down black plastic to retain heat, then plant into holes made in plastic. Where insects are a problem, cover seedlings with floating row covers to exclude them, removing when plants blossom. Keep young vines well watered and fed, tapering off as fruits ripen up for best sweet flavor.
Pick melons when the tendril closest to the fruit turns brown, and the light patch on the bottom of the melon changes from cream to tan. These small watermelons keep well in the refrigerator. Cut juicy wedges of all 3 colors for summer parties and picnics.
HARVEST AND USERegular price $4.99Sale price $4.99Unit price / per -
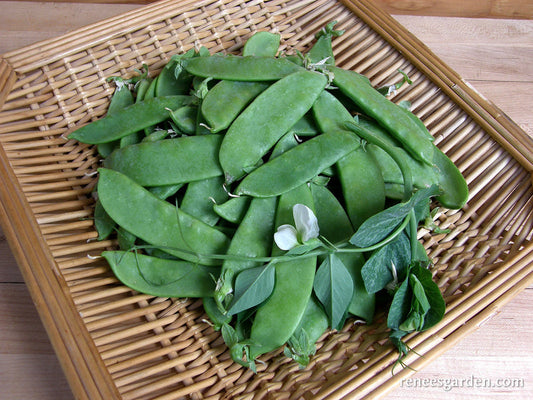
Edible Pod Snow Peas Oregon Giant
START SEEDS OUTDOORS
In early spring, as soon as soil can be worked, plant peas in full sun in well-worked, fertile soil. Sow seeds 1 inch deep and 2 to 3 inches apart. Sow seeds in wide rows or bands 3 inches across, spacing the wide rows 2 feet apart. Provide supports for these 2 1/2-3 foot vines at planting time. Protect from marauding birds with netting or floating row covers if necessary. If first sowing doesn’t germinate evenly, replant right away as new seedlings catch up quickly. Sow again for a fall crop about 2 1/2 months before first expected fall frost.
GROWING NOTES
Use netting or wire trellis or short tree branches stuck into the ground to support these heavy bearing vines for easy picking. Turn a sprinkling of bone meal and wood ashes into the soil before planting. Keep pea vines well weeded and watered, and mulch to conserve moisture.
HARVEST AND USE
Pick frequently when pods are fully formed but still flat with tiny immature peas. Snow peas are delicious in stirfries with ginger, soy sauce and garlic. Cook very quickly, just until pods turn a deeper green color. Or simply enjoy the juicy pods fresh off the vines.Regular price $2.99Sale price $2.99Unit price / per -
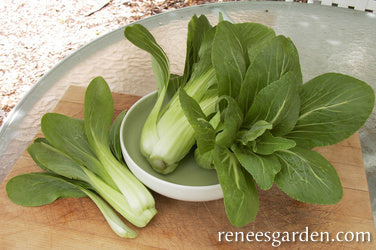
Baby Pak Choi Green Fortune
TO START OUTDOORS
In very early spring as soon as ground can be worked, prepare a well-drained, fertile garden bed in full sun. Sow seeds 2 inches apart in rows spaced 6 to 8 inches apart. Cover 1/4 inch deep and keep soil evenly moist to ensure good germination. Sow again in late summer for another fast growing crop.
TO START INDOORS
Sow seeds in a container of seed starting mix 2 inches apart and cover 1/4 inch deep. Keep moist and provide a strong light source until seedlings are about 3 inches tall and ready to plant in the garden.
THIN OR TRANSPLANT
Space seedlings 5 to 6 inches apart to give plants room to mature.
GROWING NOTES
Pak Choi thrives in rich soil and cool growing conditions. Be sure to thin seedlings and keep well weeded and watered for best tasting crunchy heads. Feed 2 or 3 times during the growing season with fish emulsion or another high nitrogen fertilizer.
HARVEST AND USE
Use early thinnings in salads. Cut whole vase-shaped little heads when they are plump and well filled out. Chop coarsely for delicious quick stir fries, or braise in a little butter and broth just until tender-crisp. Green Fortune is mild and sweet tasting and chock full of vitamins and antioxidants.
Regular price $3.99Sale price $3.99Unit price / per -
Snow Peas Oregon Sugar Pod II
START SEEDS OUTDOORS
In early spring, as soon as soil can be worked, plant peas in full sun in well-worked, fertile soil. Sow seeds 1 inch deep and 2 to 3 inches apart. Sow seeds in wide rows or bands 3 inches across, spacing the wide rows 2 feet apart. Provide supports for these 2 1/2 foot vines at planting time. Protect from marauding birds with netting or floating row covers if necessary. If first sowing doesn’t germinate evenly, replant right away as new seedlings catch up quickly. Sow again for a fall crop about 2 1/2 months before first expected fall frost.GROWING NOTES
Use netting or wire trellis or short tree branches stuck into the ground to support these heavy bearing vines for easy picking. Turn a sprinkling of bone meal and wood ashes into the soil before planting. Keep pea vines well weeded and watered, and mulch to conserve moisture.
HARVEST AND USE
Pick peas frequently when pods are fully formed but still flat with tiny immature peas. Snow peas are delicious in stir-fries with ginger, soy sauce and garlic, but cook very quickly, just until they turn a deeper green color. Or enjoy the juicy pods as you pick them fresh from the vines.Regular price $4.89Sale price $4.89Unit price / per -
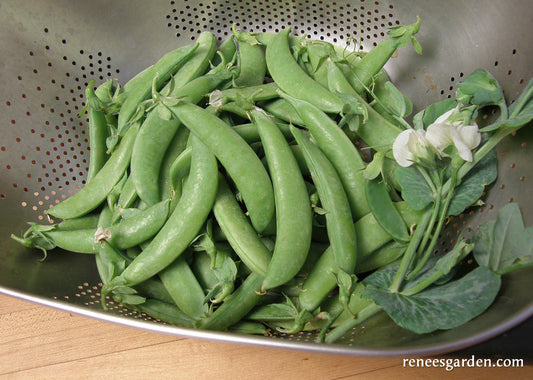
Sugar Snap Peas Super Sugar Snap
START SEEDS OUTDOORS
In early to mid-spring, plant peas in full sun in well-worked, fertile soil. Sow seeds 1 inch deep and 2 to 3 inches apart in wide rows or bands 3 inches across, spacing the wide rows 2 feet apart. Provide supports for these 5 foot vines at planting time. Protect from marauding birds with netting or floating row covers if necessary. Wet and cold early spring weather may affect germination so if first sowing doesn’t germinate evenly, replant right away as new seedlings catch up quickly. Sow again for a fall crop about 2 1/2 months before first expected fall frost.
HARVEST AND USE
Harvest only when peas are mature and round in the thick-walled, juicy pods for the best developed flavor. Savor their sweet crunch fresh from the garden (kids especially love them!) as a snack or slice into salads. To cook quickly, pull strings from pods and sauté in a little oil just until pods turn a deeper green color.
GROWING NOTES
Use netting or wire trellis to support these heavy bearing vines for easy picking. Turn a sprinkling of bone meal and wood ashes into the soil before planting. Keep pea vines well weeded and watered and mulch to conserve moisture. Water at the base of the plants to avoid mildew.Regular price $3.39Sale price $3.39Unit price / per -
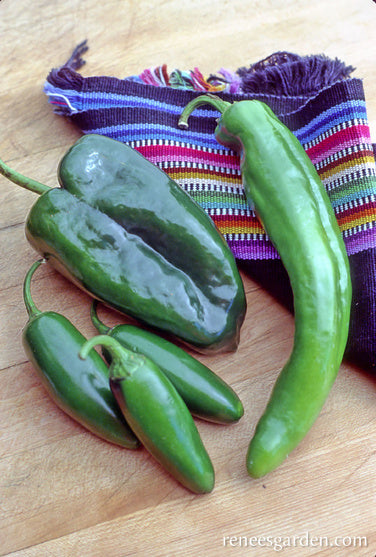
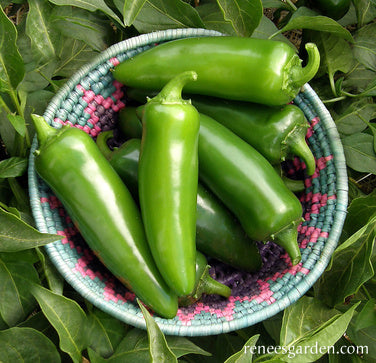
Chile Peppers Southwestern Chile Trio
STARTING SEEDLINGS
In early spring, start seeds indoors about 2 months before night temps are reliably in the 50-55°F (10-13°C) range. Sow seeds ¼ inch deep and 1 inch apart in seed starting mix. Keep moist but not soggy and very warm, 80-85°F (27-29°C). Provide a strong light source until ready to plant outside. When seedlings are 2 inches tall, transplant into individual small pots. Maintain at 70-75°F (21-24°C). Feed with half-strength fertilizer every 2 weeks until weather is warm enough to gradually acclimate seedlings to outdoor conditions. Transplant 2-2 1/2 feet apart into rich soil in full sun.
GROWING NOTES
Don’t transplant chiles outdoors until night temperatures stay securely above 55° (13°C). Prepare soil well with aged manure or compost. Plant only robust seedlings with well developed roots. Mulch well to maintain even soil moisture. Stake or cage chile plants to support their heavy fruit sets. Keep weeded, watered and feed monthly throughout the growing season.
HARVEST AND USE
Harvest when chiles have a high gloss by cutting, not pulling, them from the plant. Color develops as chiles mature; pick green or allow to color up. Use mild Anchos, medium New Mex, and hot Jalapeños to suit your taste in all kinds of delicious salsas, fajitas, chile rellenos, rich sauces, rubs, soups or stews. Use fresh, or roast and remove skins. Freeze roasted chilies for future use.
Regular price $4.69Sale price $4.69Unit price / perNew -
Shelling Peas Sabre
START SEEDS OUTDOORS
In early to mid-spring, plant peas in full sun in well-worked, fertile soil. Sow seeds 1 inch deep and 2 to 3 inches apart in wide rows or bands 3 inches across, and 2 feet apart. Provide supports at planting time; vines grow 2 1/2 to 3 feet tall. Protect seedlings from marauding birds with netting or floating row covers if necessary. Wet, cold early spring weather may affect germination, so if first sowing doesn’t come up evenly, replant right away; new seedlings will catch up quickly. Sow again for a fall crop about 2 1/2 months before first expected fall frost.
HARVEST AND USE
Harvest only when peas are well developed in their pods. Crack open the pods by pushing on the edge of the pod to open, then scoop out the delectable peas. When garden fresh, peas really are at their most delicious simply eaten raw right from their pods–kids especially love them! Or briefly steam the shelled peas just until tender, then serve with a dollop of butter or sour cream and a sprinkle of chopped fresh mint, dill or lemon thyme.
GROWING NOTES
Provide netting, trellis or short stakes at planting time to support these heavy bearing vines for easy picking. Turn a sprinkling of bone meal and wood ash into the soil before planting. Keep pea vines well weeded and watered and mulch to conserve moisture. Water at the base of the plants to avoid mildew.Regular price $2.99Sale price $2.99Unit price / per -
Mini Snack/Salad Peppers Baby Belle
STARTING SEEDLINGS
In early spring, start indoors about 2 months before outdoor night temperatures are reliably in the 50-55°F (10-13°C) range. Sow seeds ¼ inch deep and 1 inch apart in a container of starting mix. Keep moist but not soggy, and very warm 80-85°F (27-30°C). Provide a strong light source until seedlings are ready to plant outside.
When seedlings are 2 inches tall, transplant into 4 inch individual pots. Maintain at 70-75°F (21-24°C). Feed with half-strength fertilizer every 2 weeks until weather is warm enough to gradually acclimate seedlings to outdoor conditions. Plant out 2 to 2½ feet apart into rich soil in full sun.
GROWING NOTES
Don’t plant peppers outdoors until night temperatures stay securely above 55°F (13°C). Prepare soil with aged manure or compost. Plant only robust seedlings with well-developed roots. Mulch plants to maintain even soil moisture. Stake or cage your pepper plants to support their heavy fruit set.
HARVEST AND USE
Pick the 3 to 4 inch peppers when fully colored up. Cut rather than pull them from plants. Enjoy them sliced up raw, sautéed, stirfried, grilled or piled on pizza.Regular price $3.99Sale price $3.99Unit price / per -
Baby Snack Peppers Yummy Belles
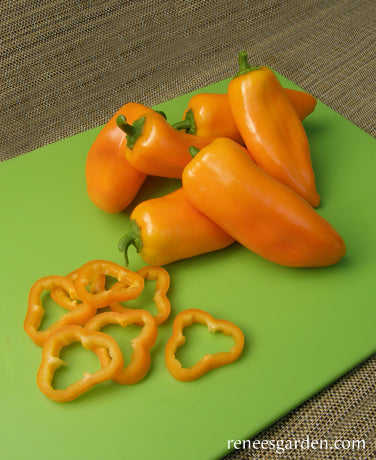
Vigorous Yummy Belle was bred in the Czech Republic by a fine family owned seed house that specializes in developing delicious peppers. The compact and productive plants load up early with sweet and crunchy, thick walled fruits that quickly ripen up bright orange for harvesting. You’ll have lots of plump and pretty 3 to 4 inch minis for fresh tasty snacks, to slice into salads, top pizza or enjoy in stir fries. These versatile little sweet peppers are real winners.
STARTING SEEDLINGS
In early spring, start indoors about 2 months before outdoor night temperatures are reliably in the 50-55°F (10-13°C) range. Sow seeds 1/4 inch deep and 1 inch apart in a container of starting mix. Keep moist but not soggy, and very warm 80-85°F (27-30°C). Provide a strong light source until seedlings are ready to plant outside. When seedlings are 2 inches tall, transplant into 4 inch individual pots. Maintain at 70-75°F (21-24°C). Feed with half strength fertilizer every 2 weeks until weather is warm enough to gradually acclimate seedlings to outdoor conditions. Plant out 2 to 2 1/2 feet apart into rich soil in full sun.
GROWING NOTES
Don’t plant peppers outdoors until night temperatures stay securely above 55°F (13°C). Prepare soil with aged manure or compost. Plant only robust seedlings with well-developed roots. Mulch plants to maintain even soil moisture. Stake or cage your pepper plants to support their heavy fruit set.
HARVEST AND USE
Pick the 3 to 4 inch peppers when fully colored up orange. Cut rather than pull them from plants. Enjoy them sliced up raw, sautéed, stir fried, grilled or piled on pizza.Regular price $3.69Sale price $3.69Unit price / per -
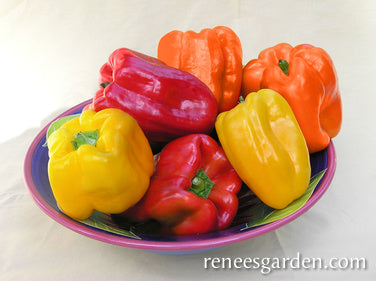
Jewel-Toned Bell Peppers Crimson, Gold & Orange
STARTING SEEDLINGS
In early spring, start indoors about 2 months before outdoor night temps are reliably in the 50-55°F (10-13°C) range. Sow seeds 1/4 inch deep and 1 inch apart in a container of starting mix. Keep moist but not soggy, and very warm, 80-85°F (27- 29°C). Provide a strong light source until seedlings are ready to plant outside.
When seedlings are 2 inches tall, transplant 2 inches apart into deeper containers or individual pots. Maintain at 70-75°F (21-24°C). Feed with half-strength fertilizer every 2 weeks until weather is warm enough to gradually acclimate seedlings to outdoor conditions. Plant out 2 1/2 feet apart into rich soil in full sun.
GROWING NOTES
Don’t plant peppers outdoors until night temperatures are above 55°F (13°C). Prepare soil with aged manure or compost. Plant only robust seedlings with well-developed roots. Mulch plants to maintain even soil moisture. Stake or cage your plants to help support their heavy fruit set.
HARVEST AND USE
Ready to pick in late summer, pepper fruits start out green and ripen up to rich red, orange or golden yellow, depending upon variety. Edible at any stage, glossy, fully colored fruits have the best flavor and are high in vitamins A and C. Carefully cut rather than pull peppers from plants. Enjoy these pretty peppers sliced up raw, sautéed, stir fried or grilled.Regular price $4.99Sale price $4.99Unit price / per -
Mild Habanero Chiles Orange & Red Suave
STARTING SEEDLINGS
In early spring, start indoors about 2 months before night temperatures stay reliably 50 - 55°F (10 - 13°C). Sow seeds 1/4 inch deep and 1 inch apart in a container of seed starting mix. Keep moist but not soggy, and very warm 80°F (27°C). Provide a strong light source until seedlings are ready to plant outside. When seedlings are 2 inches tall, transplant into deeper individual containers. Maintain at 70°F (21°C). Feed with half-strength fertilizer every week until weather is warm and settled, then gradually acclimate seeds to outdoor conditions. Transplant 2 feet apart into rich soil in full sun.
GROWING NOTES
Habaneros need warm conditions. Don’t transplant outdoors until night temperatures stay securely above 55°F (13°C). Prepare soil well with aged manure or compost. Plant only robust seedlings with well-developed roots. Mulch plants to maintain even soil moisture. Keep well weeded, watered and fertilized.
HARVEST AND USE
To harvest, cut rather than pull fruits from the plants when fully colored orange or red. With Suaves, you’ll enjoy habaneros' unique taste without their incendiary heat. Use freely in all kinds of fresh salsas, sauces, jerk rubs and marinades. You’ll find them no hotter than mellow New Mexico green chilies, with Suave Red rated a mild 580 Scoville units and Suave Orange a smooth 835 heat units, compared to the 575,000 heat units of the normal habanero chile!
Regular price $3.39Sale price $3.39Unit price / per -
Heirloom Chile Peppers Classic Jalapeño
STARTING SEEDLINGS
In early spring, start indoors about 2 months before night temperatures stay reliably 50-55°F (10-13°C). Sow seeds 1/4 inch deep and 1 inch apart in a container of seed starting mix. Keep moist but not soggy, and very warm 80-85°F (27-30°C). Provide a strong light source until seedlings are ready to plant outside. When seedlings are 2 inches tall, transplant into deeper individual containers. Maintain at 70-75°F (21-24°C). Feed with half-strength fertilizer every week until weather is warm enough to gradually acclimate seedlings to outdoor conditions. Transplant 2 feet apart into rich soil in full sun.
GROWING NOTES
Jalapeños need warm conditions. Don’t transplant outdoors until night temperatures stay securely above 55°F (13°C). Prepare soil well with aged manure or compost. Plant only robust seedlings with well-developed roots. Mulch plants to maintain even soil moisture. Keep well weeded, watered and fertilized.
HARVEST AND USE
To harvest, cut rather than pull fruits from the plants when deep glossy green or fully colored to red. Enjoy Jalapeños fresh or roast and remove skins. Use freely in all kinds of fresh salsas, sauces, fajitas and marinades. Jalapeños are great pickled or stuffed with cheese for chile "poppers."Regular price $4.89Sale price $4.89Unit price / per -
Sweet Bell Peppers Orange Sun & Jupiter
STARTING SEEDLINGS
In early spring, start indoors about 2 months before outdoor night temperatures are reliably in the 50-55°F (10-13°C) range. Sow seeds 1⁄4 inch deep and 1 inch apart in a container of starting mix. Keep moist but not soggy, and very warm 80-85°F (27-30°C).
Provide a strong light source until seedlings are ready to plant outside. When seedlings are 2 inches tall, transplant into individual 4 inch pots. Maintain at 70-75°F (21-24°C). Feed with half-strength fertilizer every 2 weeks until weather is warm enough to gradually acclimate seedlings to outdoor conditions. Plant out 2 to 2 1/2 feet apart into rich soil in full sun.
GROWING NOTES
Don’t plant peppers outdoors until night temperatures stay securely above 55°F (13°C). Prepare soil with aged manure or compost. Plant only robust seedlings with well-developed roots. Mulch plants to maintain even soil moisture. Stake or cage your pepper plants to support their heavy fruit set.
HARVEST AND USE
Ready to pick in late summer, pepper fruits start out green and ripen up to rich red, or orange, depending upon variety. Edible at any stage, glossy, fully colored fruits have the best flavor and are high in vitamins A and C. Carefully cut rather than pull peppers from plants. Enjoy sliced up raw, sautéed, stir fried or grilled.Regular price $4.89Sale price $4.89Unit price / per -
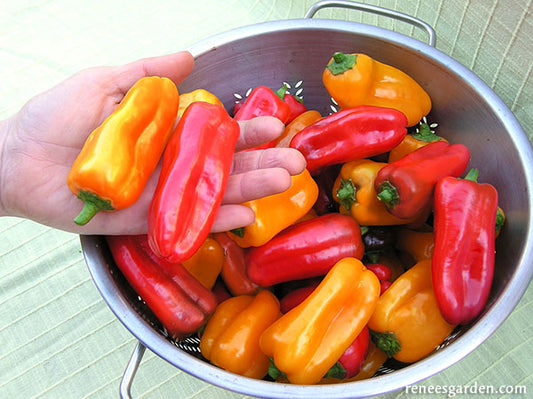
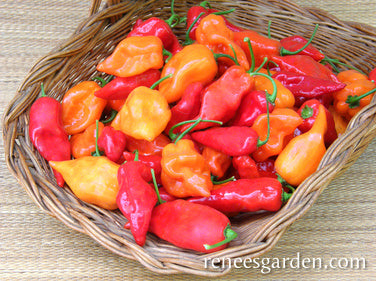
Heirloom Italian Sweet Peppers Sunset Mix
STARTING SEEDLINGS
In early spring, start indoors about 2 months before night temperatures stay above 50-55°F (10-13°C). Sow seeds ¼ inch deep and 1 inch apart in a container of seed starting mix. Keep moist but not soggy, and very warm 80-85°F (27-29°C). Provide a strong light source until seedlings are ready to plant outside. When 2 inches tall, transplant into individual 4 inch pots. Maintain at 70-75°F (21-24°C). Feed with half-strength fertilizer every week until weather is warm enough to gradually acclimate seedlings to outdoor conditions. Transplant 2 feet apart into rich soil in full sun.
GROWING NOTES
Don’t transplant outdoors until nights are above 50°F (10°C). Prepare soil well with aged manure or compost. Plant only robust seedlings with well-developed roots. Mulch plants to maintain even soil moisture.
GROWING & HARVEST
Peppers need full sun at least 6 hours per day. Mulch well to maintain even moisture. Fertilize weekly to establish vigorous plants that provide shade and protect fruit from sunburn. Stake or cage plants to keep fruit-laden branches from breaking.
Harvest when fruits are glossy and fully colored up red, orange or gold by cutting, not pulling from plants. Eat fresh, roast or grill or try them Italian style, sautéed with tomatoes, olive oil, garlic and basil, accompanied by good hard cheese and crusty bread.
Regular price $4.89Sale price $4.89Unit price / per -
Giant Pumpkins Wyatt's Wonder
BEST TO START OUTDOORS
Pumpkins need full sun, rich fertile soil and warm temperatures. Plant only when weather is warm and night temperatures stay above 50° (10°). Make slightly mounded hills 3 feet across and 6 feet apart. Plant 4 seeds per hill. Thin seedlings to leave only the strongest plants, 2 vines per hill.
GROWING NOTES
Plant where the vigorous vines can sprawl. Protect young seedlings from marauding birds by covering with berry baskets at sowing time, removing before plants get crowded. To concentrate energy into giant size pumpkins, pinch off all but one fruit on each vine at basketball size, so all the energy goes into that one pumpkin. Put a large square of plywood under growing pumpkins where they rest on soil to prevent rot. Feed regularly, about every three weeks, with a good all-purpose fertilizer and provide vines with ample water.
HARVEST AND USE
Giant pumpkins need to mature properly before harvesting. Wait until rinds are fully deep orange and tough enough to resist piercing with a fingernail. Cut from vines, leaving 3 to 4 inches of stem "handles." Let cure in the sun for 10 days, then store in a cool, dry place to keep for months. Wyatt's Wonders make fabulous supersized Jack O’ Lanterns to light up the whole neighborhood! You can also bake the rich orange flesh for pies, soups or casseroles.Regular price $3.99Sale price $3.99Unit price / per -
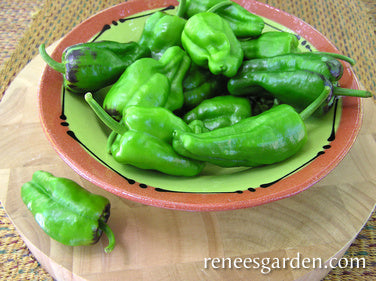
Tapas Peppers Spanish Padron
STARTING & GROWING
In early spring, start indoors 8 to 10 weeks before outdoor night temperatures are in the 55°F (13°C) range. Sow seeds 1/4 inch deep and 1 inch apart in a container of seed starting mix. Keep moist but not soggy, and very warm 75°F (24°C). Provide a strong light source until seedlings are ready to plant outside. When seedlings are 2 to 3 inches tall, transplant 3 inches apart into deeper containers. Maintain at 70°F (21°C). Feed with half-strength liquid fertilizer every 2 weeks. When weather is 55°F (13°C) both day and night, gradually acclimate seedlings to outdoor conditions. Transplant 1 1/2 feet apart into rich soil in full sun. Peppers need full sun at least 6 hours per day. Prepare soil well with aged manure or compost. Plant only robust seedlings with well-developed roots and mulch well to maintain even soil moisture. Water regularly and consistently and fertilize several times a month.
HARVESTING & PREPARING
For traditional Tapas, harvest the abundant little pointed fruits at no more than 2 inches long. At this small size, they are fragrant and flavorful; larger fruits get very spicy. To serve: Sauté the Tapas peppers quickly in a little hot olive oil just until the skins are glossy and slightly charred. To finish, sprinkle with coarse salt and enjoy while still hot. Most Padrons are mild, but occasionally one little pepper will have more spice — this is traditional and even sought after in Spain.Regular price $3.69Sale price $3.69Unit price / per -
Baby Pumpkins Mini Jack
BEST TO START OUTDOORS
Pumpkins need full sun, rich fertile soil and warm temperatures. Wait to plant until temperatures stay above 50°F (10°C) day and night. Sow groups of 2 to 3 seeds 2 feet apart and 1 inch deep in rows 4 feet apart. Thin to 1 strong seedling per group to give vines room to ramble. Or, make slightly mounded hills 2 to 3 feet across and 6 feet apart and plant 4 to 5 seeds in each hill. When seedlings have several sets of leaves, thin to the strongest 3 seedlings per hill.
GROWING NOTES
Protect young seedlings from marauding birds by covering with plastic berry baskets at sowing time, removing before plants get crowded. To save space, or for a handsome garden centerpiece, Mini Jack vines can easily be trained up fences, trellises or tepees.
HARVEST AND USE
All pumpkins need to mature properly, so wait to pick until rinds are fully colored and tough enough to resist piercing with a fingernail and vines have died back. Then cut, leaving a good stem handle. Let them cure for 10 days in the sun, then store in a cool dry place and they’ll keep for months. In the kitchen, hollow them out, then stuff and bake them for dandy little soup or vegetable tureens.Regular price $2.99Sale price $2.99Unit price / per -
Heirloom French Pumpkins Cinderella's Carriage
BEST TO START OUTDOORS
Pumpkins need full sun, rich fertile soil and warm temperatures. Plant only when night temperatures are above 50°F (10°C). Sow groups of 3 seeds 3 feet apart and 1 inch deep in rows 4 feet apart. Thin to 1 strong seedling per group. Or, make circular soil mounds 3 feet across. Plant 6 seeds, 6 inches apart in center of each mound. Thin to the strongest 3 seedlings in each mound, so vigorous vines have room to grow and fruit.
GROWING NOTES
Plant pumpkins where the vigorous vines can sprawl. Protect young seedlings from marauding birds by covering with berry baskets at sowing time, removing before plants get crowded. Give vines ample water and feed several times for best yields.
HARVEST AND USE
These big plump beauties need to mature properly before harvest. Wait to pick until their rinds are fully deep orange and tough enough to resist piercing with a fingernail. Cut from vines, leaving good stem handles. Let cure in the sun for 10 days then store in a cool dry place and they’ll keep for months. Steam or bake the rich orange flesh for baked goods, soups or casseroles. Or hollow out the inside and use the ornamental pumpkin whole as a show-stopping serving dish for soup or stew.Regular price $4.39Sale price $4.39Unit price / per -
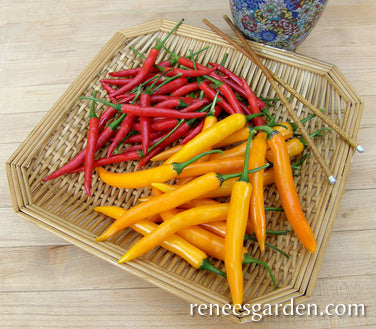
True Thai Chiles Full Moon & Vesuvius
STARTING SEEDLINGS
In early spring, start indoors about 2 months before night temperatures stay reliably 50-55°F (10- 13°C). Sow seeds 1/4 inch deep and 1inch apart in a container of seed starting mix. Keep moist but not soggy, and very warm 80-85°F (27-30°C). Provide a strong light source until seedlings are ready to plant outside. When seedlings are 2 inches tall, transplant into deeper individual containers. Maintain at 70-75°F (21-24°C). Feed with half strength fertilizer every week until weather is warm enough to gradually acclimate seedlings to outdoor conditions. Transplant 2 feet apart into rich soil in full sun.
GROWING NOTES
Chiles need warm conditions. Don’t transplant outdoors until night temperatures stay securely above 55°F (13°C). Prepare soil well with aged manure or compost. Plant only robust seedlings with well-developed roots. Mulch plants to maintain even soil moisture. Keep well weeded, watered and fertilized.
HARVEST AND USE
Harvest when chiles have a high gloss and are fully ripened to orange for the medium-hot Full Moon and red for Vesuvius. To dry for year-round use, cut whole branches of chiles or harvest individually and string from the stem end. Hang in a warm, airy location. Use in all Thai and Asian stir-fries, sauces, salsas and marinades or dry and chop for spicy chile flakes to sprinkle on pizza.Regular price $3.99Sale price $3.99Unit price / per -
Holiday Mix Pumpkins Autumn Gold & Spookie
BEST TO START OUTDOORS
Pumpkins need full sun, rich fertile soil and warm temperatures. Wait to plant until temperatures stay above 50°F (10°C) day and night. Sow groups of 2 to 3 seeds 3 feet apart and 1 inch deep in rows 4 feet apart. Thin to 1 strong seedling per group to give vines room to spread.
Or, make slightly mounded hills 2 to 3 feet across and 8 ft. apart and plant 4 to 5 seeds of one variety in each hill. When seedlings have several sets of leaves, thin to 3 seedlings per hill. Protect young seedlings from marauding birds by covering with plastic berry baskets at sowing time, removing before young plants get crowded.
HARVEST AND USE
All pumpkins need to mature properly, so wait to pick until rinds are fully colored and tough enough to resist piercing with a fingernail and vines have died back. Then cut, leaving a good stem handle. Let them cure for 10 days in the sun, then store in a cool dry place and they’ll keep for months.
Carve Autumn Gold into happy or scary holiday faces and use Spookie pumpkins for smaller Jack O’Lanterns or bake them up into sweet spicy pie or savory soups.
Regular price $3.99Sale price $3.99Unit price / per -
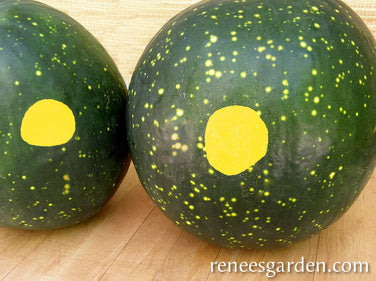
Heirloom Watermelon Moon & Stars
STARTING SEEDLINGS OUTDOORS
Melons need full sun, rich soil and warm temperatures. Plant only when weather is warm and nights stay above 50°F (10°C). Make slightly rounded hills 2 feet in diameter and 5 feet apart. Sow 5 or 6 seeds 1 inch deep in a small circle in top of each hill. When seedlings have several sets of leaves, be sure to thin them out, leaving only the 3 strongest plants to grow and mature in each hill.
TO START EARLY INDOORS
No more than several weeks before last frost date, sow seeds in individual pots of seed starting mix. Keep warm and moist, and provide a strong light source until weather warms enough to transplant outdoors (see above).
GROWING NOTESAmend soil well with aged manure or compost. If summers are short or cool, put down black plastic to retain heat, then plant into holes made in plastic. Where insects are a problem, cover seedlings with floating row covers to exclude them, removing when plants blossom. Keep young vines well watered and fed, tapering off as fruits ripen up for best sweet flavor.
HARVEST AND USE
Pick melons when the tendril closest to the fruit turns brown, and the light patch on the bottom of the melon changes from cream to tan. Watermelons keep well in the refrigerator, even after being cut open.Regular price $4.89Sale price $4.89Unit price / per

