Wholesale Bonus Packets (Renee's)
-
Regular price $9.99Sale price $9.99Unit price perNew
-
Regular price $9.99Sale price $9.99Unit price perNew
-
Regular price $9.99Sale price $9.99Unit price perNew
-
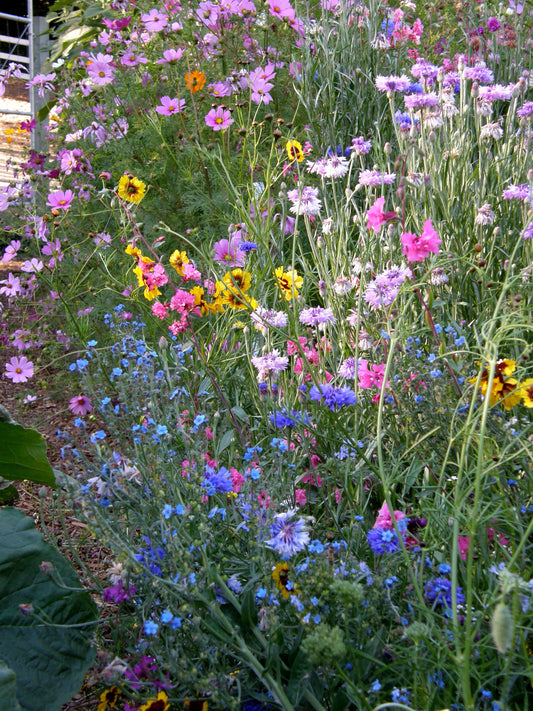
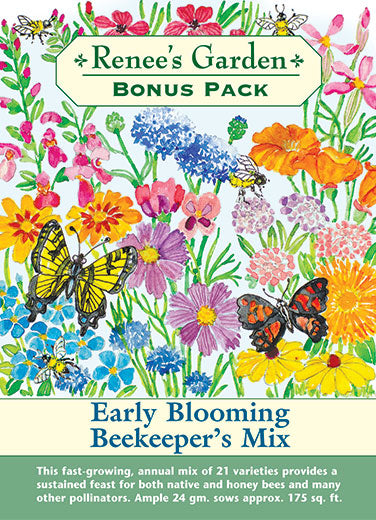
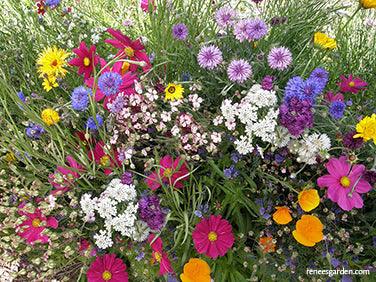
Bonus Pack Early Blooming Beekeeper's Mix
ANNUAL
Spring/summer bloom
Frost tenderBEST TO START DIRECTLY OUTDOORS
In early spring, after all danger of frost is past, plant in a well-prepared garden bed in full sun. Shake packet to mix. Scatter the seed thinly and evenly over finely worked soil, aiming to have the seeds about an inch or so apart. Cover lightly, about 1/4 inch deep, and gently firm the soil over the seeds – a rake is handy for this step.
Water thoroughly and evenly with a very gentle spray. Keep the seed bed moist while awaiting germination and while flowers are actively growing for the most blossoms. The many flower varieties in this pretty mix will grow and bloom in succession throughout late spring and summer.
Regular price $9.99Sale price $9.99Unit price per -
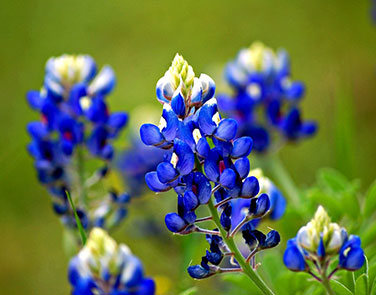
Bonus Pack Texas Bluebonnets
Annual USDA Zones 5-8
Bluebonnets require full sun and well-drained ordinary soil of moderate alkalinity. They will not tolerate heavy clay soils, so if you have dense clay soil, grow them in raised beds amended with compost and sand to give them the good drainage they need. Bluebonnets are drought-adapted; do not overwater them during active growing periods.HOW BLUEBONNETS GROW AND WHAT THEY NEED
Bluebonnet’s large, hard-coated seeds respond best to late summer/fall planting as exposure to winter soil abrasion. Precipitation and weather changes break down the naturally tough outer coat of the seeds to produce germination in fall or early spring. As spring breaks, plants respond to sun and warmth, and then bloom gloriously, attracting happy bees and butterflies. The beautiful flower spikes are deep blue with white tips. After flowering, seedpods form, dry and drop seed to rebloom the next season.
SOWING AND GROWING BLUEBONNETS
Plant seeds in late summer or early fall to overwinter and bloom the next spring (in hard winter areas, sow in very early spring). Plant in ordinary garden soil, preparing the soil by removing weeds, grass and stones. Evenly loosen the top 4 inches of soil with a shovel or digging fork and break up soil clumps, then rake smooth.
Broadcast the seed over the seed bed, aiming for 6 inch spacing. Cover lightly with soil, tamping it down to make sure the seeds get good soil contact. Water in well at planting time, then keep moist but on the dry side until seasonal rains take over. Seeds may take 3 to 4 weeks to slowly and unevenly germinate. Foliage rosettes of 5-7 leaves will develop close to the ground and overwinter that way. (If cold weather comes on, seeds may delay germination until the next spring.) After germination, seedlings develop long tap roots and usually don’t require additional irrigation.
In mild early spring weather, bluebonnets will actively begin growing again. Plants rapidly develop multiple 8-12 inch flowering stalks that bloom in a gorgeous blue color with white tips. After the colorful flowers fade, green seedpods form. When they are dried up and dark brown, pods pop open and drop seed to self-sow for next spring’s flowers.
Regular price $9.99Sale price $9.99Unit price per -
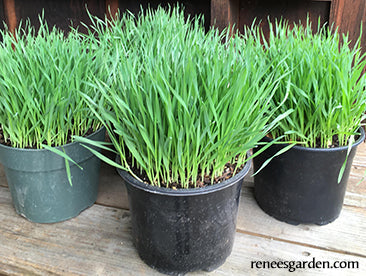
Bonus Pack Wheatgrass For Juicing
GROW IN POTS INDOORS OR OUT
Wheatgrass can be grown indoors year round; it prefers temperatures between 65-75° F (18 to 24° C) or or grow outdoors in pots after spring weather is warm, and nights are over 50° F (10° C). This generous packet provides more than enough seed for 6 separate sowings in 6 inch pots. Disinfect pots before use by soaking in a solution of 1 part bleach and 9 parts water for 30 minutes and air dry.
GROWING AND HARVESTING
Fill a 6 inch in diameter or larger pot (that has a drainage hole) with moistened organic planting mix. Sprinkle seeds evenly over the surface about 1/4 inch apart. Cover 1/2 inch deep with planting mix. Water gently but thoroughly. Check often; keep moist but not soggy. Keep pot in bright light or full sun. Harvest by cutting with scissors when wheatgrass is 4 to 6 inches tall, about 10 to 14 days after sowing. Wheatgrass grows back for a second harvest, but the second harvest will be weaker.
For a constant supply, sow more seeds in a new pot weekly, always using fresh soil mix. Harvest and use pots of grass in succession. After the second harvest in each pot, discard and start again with more seeds and fresh soil mix. (Each sowing uses up the available nutrients in soil mix so discard and use fresh mix) A 6 inch pot of wheatgrass will yield about 5 to 6 ounces of fresh juice.
HOW TO USE
Wheatgrass must be consumed as juice. If you want to juice regularly, we recommend buying a specialized wheatgrass juicer, which makes juicing easy and produces a superior product. A lesser, but passable alternative is to put a handful of cut wheatgrass in a blender with a cup of water, blend until liquefied and carefully strain out pulp from the juice. Drink immediately or keep refrigerated and drink soon: juice loses quality and nutrient value quickly. Drink 1 ounce of wheatgrass juice per day for general health.
Regular price $6.99Sale price $6.99Unit price per -
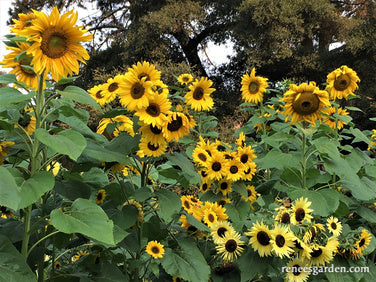
Bonus Pack An Heirloom Sunflower Forest
ANNUAL
Spring/summer bloom
Frost tenderEASIEST TO PLANT OUTDOORS
Plant in full sun in good garden soil only when weather is warm and settled, all danger of frost is past and both days and nights are evenly in the 50°F (10°C) range. Poke individual seeds into well-worked soil about 1/2 in. deep, 4 to 5 in. apart. Press the soil firmly over the seeds and keep the seedbed evenly moist until seedlings emerge in 8 to 10 days.
Important: when the seedlings are well-established, carefully thin them to a final spacing of 1 foot apart; this way they will have enough room to develop sturdy stalks that won’t blow over and big clusters of flowers. Any extra seedlings you need to remove can be transplanted elsewhere in the garden or potted up and given to friends.
TO START EARLY INDOORS
Several weeks before last frost date, sow seeds 1/2 inch deep in individual pots of well-drained seed starting mix. Keep moist and provide a strong light source until seedlings are well established and ready to plant outside. Transplant carefully, disturbing the roots as little as possible. Space seedlings 1 foot apart so plants will have room to grow and mature.
GROWING NOTES
Growing these colorful sunflowers for pollinators and bouquets is both easy and rewarding. Make several sowings several weeks apart and you’ll have a succession of flowers in full bloom. Keep soil moist and well weeded. Protect very young seedlings from bird predation by covering the bed with bird netting held tautly well above seedlings by supports. Or use plastic berry baskets, removing before plants get crowded.
Regular price $8.99Sale price $8.99Unit price per -
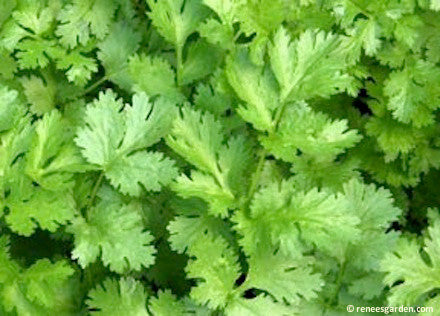
Bonus Pack Heirloom Cilantro
ANNUAL
Spring/summer/fall harvest
Can handle light frostsSTART OUTDOORS DIRECTLY INTO THE GARDEN
In early spring, sow cilantro seed directly into well-drained fertile soil 1 to 2 inches apart in wide rows in full sun. Cover 1/2 inch deep and firm soil over seeds. Keep seed bed evenly moist as seedlings emerge over 10 to 20 days. Make new sowings every few weeks until mid summer for continuous harvests of fresh leaves. Plant again in cool fall weather. Thin plants 3 to 4 inches apart before they get crowded so seedlings have room to grow.
GROWING AND HARVEST NOTES
To have a consistent supply of fresh leaves, sow wide rows of cilantro seeds successively every 2 weeks from early spring through early summer. Keep your cilantro patch at its best tasting leafy stage longer by thinning seedlings early and keeping plants well watered. Plant again when weather cools for a quick and tasty fall crop. Cilantro plants will inevitably flower and then set seed quickly when plants get mature. Their lacy white blossoms attract beneficial insects, butterflies and pollinating bees to the garden. The fragrant round seeds that follow the flowers are called coriander, a wonderfully aromatic spice used in baking.Regular price $8.99Sale price $8.99Unit price per -
Bonus Pack Seeds for A Butterfly Garden
TWO DESIGN IDEAS
Plant your butterfly garden in a rectangular bed or border with tall, medium and low flowers from back to front, OR in a circle with tall flowers in the center, surrounded by the middle and then lower growing varieties.
For the back of the border in dramatic rows, OR planted in a circle garden as a central spiral, tall, branching Crimson Queen sunflowers offer both a convenient meal and a windscreen for your winged visitors.
At mid-level, Purity Cosmos' abundant snow-satiny white flowers with sunny centers dance and sway all summer, a magnet for air-waltzing butterflies.
At front of the border OR around the outer edge of the circle, low-growing Persian Carpet zinnias offer a beautiful tapestry of warm shades and provide nectar for many species.
CREATING BUTTERFLY HABITATButterflies are attracted to blossom shapes and colors, so it's important to plant in mass blocks instead of a few isolated plants here and there. Planting these flowers behind each other produces an ideal combination of different flowers at varying heights, offering your visitors a choice of where to feed and rest.
These flowers provide flower nectar for nourishment and fuel butterflies need for flying. Flowers unique personal attributes of color, scent and shape lure butterflies and ensure pollination. With each sip from the heart of a blossom, tiny grains of pollen gather on the butterfly’s body and then it helps to pollinate the garden as it flutters among flowers.
Sunny days in the garden are synonymous with a busy freeway of flying butterflies. The sun warms their wing muscles, enabling them to dart, soar and fly seeking nectar and pollinating your sun loving flowers. On gusty summer days, the taller cosmos and sunflowers offer comfortable protection from the wind. Offer butterflies a convenient drinking spot with a shallow bird bath or decorative stone water container.
Regular price $8.99Sale price $8.99Unit price per -
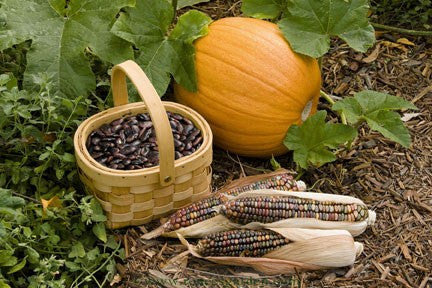
Bonus Pack Native American Three Sisters Garden
Read "Celebrate the Three Sisters," for complete historical and planting information.
LISTEN to radio show about the Three Sisters (.mp3).HOW AND WHEN TO PLANT
1. Choose a site in full sun (minimum 6 to 8 hours/day of direct sunlight throughout the growing season). Amend the soil with plenty of compost or aged manure. With string, mark off three 10 foot long rows, each 5 feet apart.
2. In each row, make your corn/bean mounds. The center of each mound should be 5 feet apart from the center of the next. Each mound should be 18 inches across with flattened tops. Stagger the mounds in adjacent rows.
3. Plant 4 to 6 corn seeds in each mound in a 6 inch square. Protect from birds with netting until seedlings are 4 inches tall.
4. When the corn is 6 inches tall, it's time to plant the beans and squash. First, weed the entire patch. Then plant 4 bean seeds in each corn mound. They should be 3 inches apart from the corn plants.
5. Build pumpkin mounds in each row between each corn/bean mound. Make them the same size as the corn/bean mounds. Plant 4 or 5 pumpkin seeds, 4 inches apart in a triangle in the middle of each mound.
6. When the pumpkin seedlings emerge, thin them to 2 plants per mound. You may have to weed the area several times until the pumpkin vines take over and shade new weeds.
Regular price $8.99Sale price $8.99Unit price per -
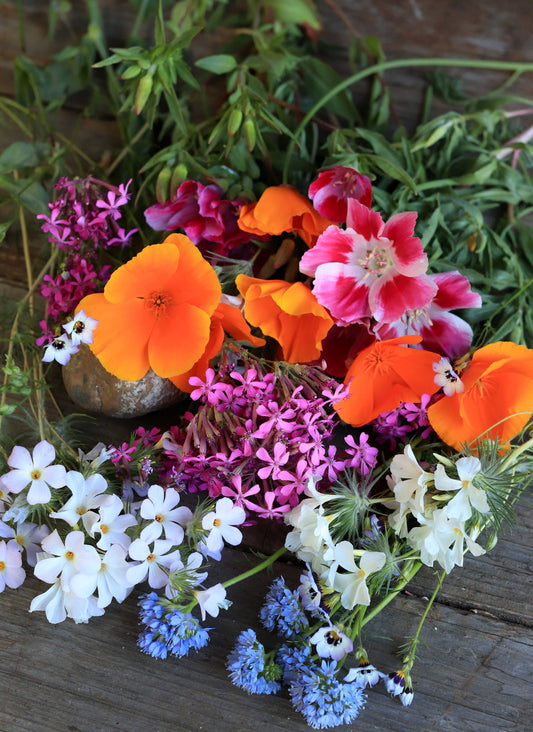
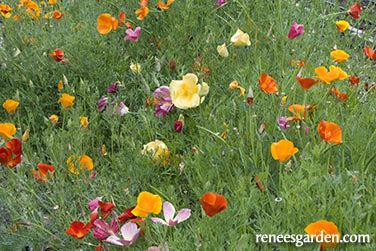
Bonus Pack A Rainbow of California Poppies
START SEED DIRECTLY IN THE GARDEN
Sow seeds directly in fine textured, well drained soil in full sun as early in spring as the ground can be worked. Plant as early as possible in spring, as poppies can handle light frost and bloom best and longest when plants get a good start in cool weather.
Except in very poor soil, these California poppies will flower readily with no added fertilizer.
Sprinkle seeds thinly, cover or rake in lightly, 1/4 inch deep, and firm soil gently. Be sure to keep the soil moist while awaiting germination and when seedlings are small. For best results, thin well-established seedlings to a final spacing of 6 to 8 inches apart so plants have room to grow, develop and bloom.
In Mild Winter Climates, where ground does not freeze hard, poppies can also be sown in late fall to over-winter for spring bloom. Be sure to protect fall-grown seedlings from slugs, snails and marauding birds.
GROWING NOTES
When mature, poppy plants can handle dry conditions, but will thrive and always bloom much longer if watered regularly. Poppies are lovely cut flowers if brought indoors just as buds begin to open. At season's end, allow spent flowers to form pods and drop seed if you want poppies to self-sow.
Regular price $9.99Sale price $9.99Unit price per -
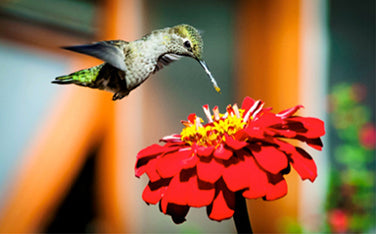
Bonus Pack Seeds for a Hummingbird Garden
TWO DESIGN IDEAS
Plant your hummingbird flower garden in a rectangular bed or border with tall, medium and low flowers from back to front, OR plant in a circle garden with the tall climber in the center, surrounded by the middle and then lower growing flowers.
At the back of the border OR climbing up a central trellis in a circle garden, climbing Scarlet Runner Beans offer abundant coral-red blossoms that hummers love to sip.
At mid-level, Scarlet Flame Zinnias bright red flowers make a splash of color easy for hummers to see from a distance.
At front of the border OR on the outside of the circle, low mounding Summer Charm Nasturtiums are a sure fit for hummingbirds' nectar-seeking bills.CREATING HUMMINGBIRD HABITAT
Plant as big an area as possible to create explosive bursts of color that can be seen easily from the air. Hummingbirds expend an extraordinary amount of energy for their size, and require an enormous amount of food – you just can't have too many flowers! After locating convenient nectar sources, these intelligent little creatures follow a foraging routine in a relatively small area despite their ability to roam and will return for ongoing meals from your garden.
These flowers offer complete natural meals: while nectar is their primary food source, blossoms also harbor small insects that are protein sources for the diminutive birds, so hummingbirds will help in your garden by dining on aphids and other tiny insects they snap up in their sharp pointed bills while simultaneously pollinating them.
Design elements such as a handsome trellis for your climbing runner bean blossoms provide a convenient, stationary perch where these territorial little birds can survey their entire domain. Enjoy watching them as they dine, hover, socialize, argue and perch, wings vibrating with amazing speed and grace, flying furiously up and down, backward, forward, even upside down amongst your colorful flowers.
Regular price $8.99Sale price $8.99Unit price per -
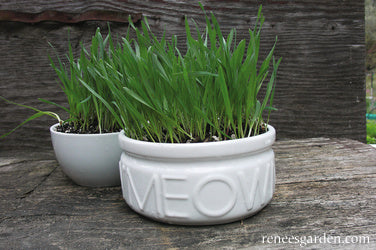
Bonus Pack Gourmet Greens Cat Treats
FOR BEST RESULTS
Fill a 6 inch diameter or larger pot with moistened planting mix. Sprinkle seeds 1/4 inch apart over the surface, cover 1/2 inch deep with mix, and water gently. Keep pot moist but not soggy, and be sure to provide a good light source. The pot of grasses can be kept indoors for pets to graze on at their leisure. Fertilize every 2 weeks using a non-chemical fertilizer, such as fish emulsion.
GROWING NOTES
This generous packet provides more than enough seed for 10 to 12 sowings for consistent fresh greens. The grasses are ready for pets to nibble when the blades are at least a few inches tall, normally in about 10 to 14 days after sowing.
If grasses get too tall and fall over, "mow" them down to 3-4 inches with a pair of scissors. For a constant supply, try sowing 1 pot a week for 2 weeks. Give your pet access to only one pot of grass at a time, and switch pots each week.
When grass does not re-grow vigorously after cutting down and fertilizing, discard and start again with more seeds and soil mix.
DINING IDEAS
Most cats will recognize the grass as a treat right away. To encourage finicky eaters, place the pot beside the kitty's food and spritz it with water. This usually does the trick and cats who newly discover this treat delight in it!
Regular price $8.99Sale price $8.99Unit price per -
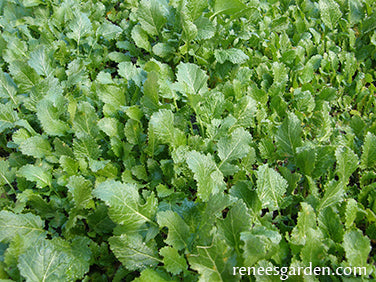
Bonus Pack Soil Building Kodiak Mustard Cover Crop Seeds
WHEN TO PLANT
In Mild Winter Climates, where ground does not freeze hard, sow in late fall to overwinter.
In Cold Winter Climates, where ground freezes hard, plant in fall for winter die back, then incorporate in spring, OR sow as early as possible in spring.
TO PREPARE THE PLANTING AREA
Remove weeds, grass and large stones. Break up soil clumps and evenly loosen the top 2 inches of soil with a rake. Scatter seeds thinly, 1 to 2 inches apart. Using a rake, cover seeds with fine soil 1/4 to 1/2 inch deep and lightly firm the soil. Water thoroughly and evenly.
Keep soil moist while germinating and when seedlings are small. Growing plants thrive best if watered regularly.
INCORPORATING YOUR COVER CROP
Method 1: When mustard is 5 to 6 inches tall, use a garden fork, shovel or rototiller to turn plants into the ground to break down and enrich soil for planting, which takes about a month.
Method 2: When mustard is about 1 foot tall, pull plants out, shake off soil, and then compost plants to incorporate into soil later as finished compost. Timing depends how long your composting process takes.
Method 3: When plants are 1 foot tall, weed whack the mustard to chop it down. Cover the chopped crop with black plastic to hasten decomposition and then turn the nutritious residue into the soil 2 to 3 weeks before sowing garden crops.
Regular price $8.99Sale price $8.99Unit price per