Container Friendly
Space-Saving Varieties are Our Specialty
Grow a cheerful profusion of flowers and savory herbs in containers of all shapes and sizes on your patio, small deck, or rooftop.
-
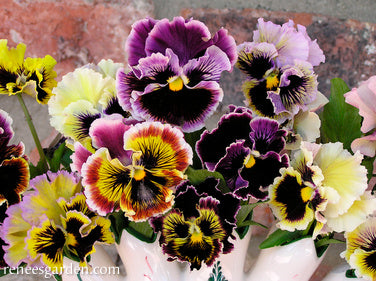
Heirloom Pansies Victorian Posy
PERENNIAL GROWN AS ANNUAL
Spring bloom
Can handle frostBEST TO START SEEDS EARLY
In Mild Winter Climates, start seeds in late summer to have plants large enough to successfully overwinter and bloom in early spring.
In Cold Winter Climates, start early indoors about 2 1/2 months before last spring frost. Sow seeds in a container of seed starting mix 1 inch apart and cover very lightly. Keep evenly moist and cool 55-60°(13-16°C), providing a strong light source. When seedlings are large enough to handle, transplant 2 inches apart into a deeper container(s) and grow to 2 to 3 inches tall. Gradually acclimate seedlings to outdoor conditions before transplanting 4 to 5 inches apart in a sunny spot.
THIN OR TRANSPLANT
Space seedlings 4 to 5 inches apart.
GROWING NOTES
Pansies will bloom longest and make largest flowers when weather is cool. In mild winter areas, late summer sowings will begin to bloom in very early spring or even late winter. Keep faded blossoms removed to prolong flowering.
Regular price $4.39Sale price $4.39Unit price / per -
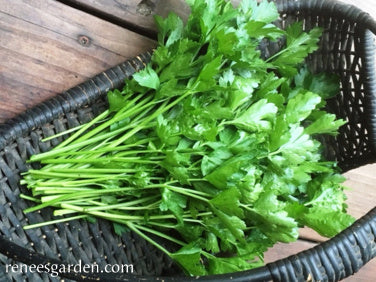
Kitchen Herbs Italian 'Gigante' Parsley
BIENNIAL, GROWN AS ANNUAL
Spring/summer/fall harvest
Frost hardyEASIEST TO START OUTDOORS
Start parsley in spring when weather is settled but still cool and/or in late summer in mild winter climates. Plant in full sun or half-day sun if climate is very hot. Sow seeds 1-2 inches apart into a well-worked fertile seed bed. Cover 1/4 inch deep. Parsley germinates unevenly over several weeks; be patient and keep seed bed evenly moist. Using synthetic row covers to hold moisture during germination is helpful; remove when seedlings are well established.
TO PLANT INDOORS
Sow parsley seeds in early spring in a container of seed starting mix. Cover 1/4 inch deep, and keep container moist but not soggy until seedlings emerge. Provide a good light source. Feed seedlings frequently until ready to transplant when several inches tall.
THIN OR TRANSPLANT
Space 3 to 4 inches apart when seedlings large enough to handle.
GROWING NOTES
Parsley needs rich moist soil and ample spacing for lush harvests. Thin early and keep well weeded and watered. Begin to harvest sparingly once plants have 8 to 10 leaves. Fertilize frequently with a high nitrogen source.Regular price $2.99Sale price $2.99Unit price / per -
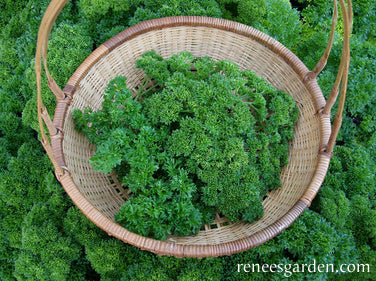
Heirloom Sweet Parsley Triple Curled
BIENNIAL, GROWN AS ANNUAL
Spring/summer/fall harvest
Frost hardyTO PLANT DIRECTLY IN THE GARDEN
In spring when weather is settled but still cool, sow seeds 1 to 2 inches apart into well-worked fertile soil in full sun and cover 1/4 inch deep. If climate is very hot, plant in a spot with morning sun and afternoon shade. Parsley germinates unevenly over several weeks; be patient and keep moist.
TO START EARLY INDOORS
Sow parsley seeds in early spring in a container of seed starting mix. Cover 1/4 inch deep, and keep container moist but not soggy until seedlings emerge. Provide a good light source. Feed seedlings frequently until ready to transplant when about 2 inches tall after acclimating to outdoor conditions.
THIN OR TRANSPLANT
Space 4 to 6 inches apart when seedlings have several sets of leaves. Feed monthly for best results.
GROWING NOTES
Parsley needs rich moist soil and ample spacing for lush harvests. Thin early and keep well weeded and watered. Begin to harvest sparingly once plants have 8 to 10 leaves. Fertilize monthly with a high nitrogen source for best leafy growth.Regular price $4.89Sale price $4.89Unit price / per -
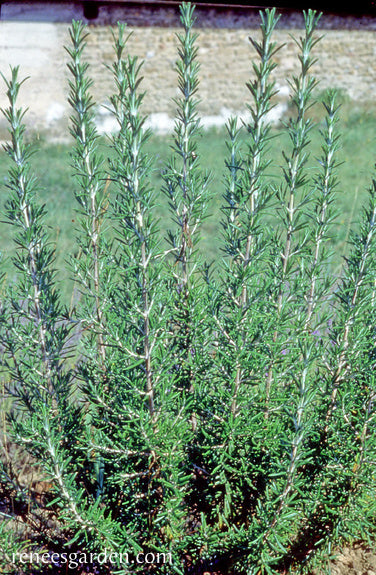
Kitchen Herbs French Rosemary
BEST TO START INDOORS
In early spring, sow seeds an inch apart in fine seed starting mix. Cover seeds very lightly with mix. Maintain at 70°F (24°C) and provide a strong light source. While awaiting germination, be sure to keep the seed bed moist but not soggy. Be patient: these small perennial seeds germinate very slowly over 1 to 2 months.
When they have several sets of leaves, transplant seedlings into individual 4 to 6 inch pots so root systems have room to develop. When all danger of frost has past, plant 2½ feet apart in well-drained soil in full sun.
To grow in containers, transplant each plant into a pot with at least a 3 gallon capacity (or 12 inch pot).
GROWING NOTES
Like many perennial herbs, rosemary has a naturally low germination rate and grows slowly the first season. Plants thrive in hot, dry conditions and require well drained soil.
In mild climate areas (zones 8 through 10), where winters are mild and the ground doesn’t freeze, Perennial Rosemary plants grow into substantial shrubs in mild climates. In cold winter areas (zones 3 to 7), plant seedlings into large pots to enjoy throughout spring and summer. When weather gets cold and frost threatens, prune plants back heavily and bring pots inside to spend the winter indoors in a cool, well-lit area; water very sparingly while plants are overwintering indoors. In spring, when danger of frost is over and weather is settled, move potted plants back outside to a sunny spot.
HARVEST AND USE
Rosemary’s stiff straight branches make perfect skewers for grilling. Use leaves in marinades combined with lemon, garlic and oil. Stuff a roasting chicken with whole branches and use to season lamb. Sprinkle finely minced rosemary over potatoes; dust on cheese dishes, garlic bread, grilled tomatoes and root vegetables.Regular price $3.99Sale price $3.99Unit price / per -
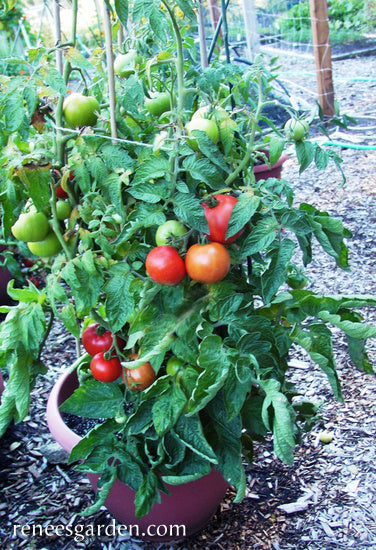
Container Tomato Super Bush
STARTING SEEDLINGS
In early spring, start indoors about 6 to 8 weeks before outdoor night temperatures are reliably in the 50-55°F (10-13°C). Sow seeds 1/4 inch deep and 1 inch apart in a container of seed starting mix. Keep moist but not soggy, and very warm, 80°F (27°C). Provide a strong light source until seedlings are ready to plant outside. When seedlings are 2 inches tall, transplant into individual 4 inch pots. Maintain at 70°F (21°C). Feed with half-strength fertilizer every 2 weeks until ready to plant. When nights reach 55°F (13°C), gradually acclimate to outdoor conditions. Plant these vigorous, early bearing vines 3 feet apart into rich soil in full sun.
Grown In Containers: Transplant one seedling per pot with a minimum size of 18 to 20 inch diameter and 18 inches high. Use fresh potting mix to prevent soil borne disease. Water regularly: in hot weather, pots may need water daily. Fertilize every other week with a low nitrogen fertilizer for strong plants and good yields.
GROWING NOTES
Tomatoes need full sun at least 6 hours every day. Provide strong stakes or wire cages at planting time as plants get heavy with fruit. Mulch plants well to maintain even moisture. Pick fully ripe. Don’t store tomatoes in the fridge.
Regular price $4.99Sale price $4.99Unit price / per -
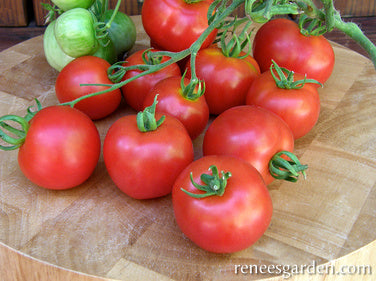
Early/Container Tomato Heirloom Stupice
STARTING SEEDLINGS
In early spring, start indoors about 6 to 8 weeks before outdoor night temperatures are reliably 50-55°F (10-13°C). Sow seeds 1/4 inch deep and 1 inch apart in a container of seed starting mix. Keep moist but not soggy, and very warm, 80°F (27°C). Provide a strong light source until seedlings are ready to plant outside. When seedlings are 2 inches tall, transplant into individual 4 inch pots. Maintain at 70°F (21°C). Feed with half-strength fertilizer every 2 weeks until ready to plant. When nights reach 55°F (13°C), gradually acclimate to outdoor conditions. Plant these vigorous, early bearing vines 3 feet apart into rich soil in full sun.
Grown In Containers: Transplant one seedling per pot; with a minimum size of 18 to 20 inch diameter and 18 inches high. Use fresh potting mix to prevent soil borne disease. Water regularly: in hot weather, pots may need water daily. Fertilize every other week with a low nitrogen fertilizer for strong plants and good yields.
GROWING NOTES
Tomatoes need full sun at least 6 hours every day. Provide strong stakes or wire cages at planting time as plants get heavy with fruit. Mulch plants well to maintain even moisture. Pick fully ripe. Don’t store tomatoes in the fridge.Regular price $4.89Sale price $4.89Unit price / per -
Japanese Baby Turnips Mikado
START SEEDS OUTDOORS
In early spring, as soon as ground can be worked, sow in well-worked, fertile soil in full sun. Sow this quick growing, cool season crop wherever you intend to plant heat lovers later. Space seeds 1 inch apart in wide rows 6 inches apart. Cover 1/2 inch deep. Keep soil evenly moist and well weeded.
GROWING NOTES
Thin seedlings early to stand 3 inches apart, giving them room to size up. Provide consistent moisture. Sow small amounts a week apart for successive harvests until summer heat comes on. Protect with floating row covers if marauding birds or flea beetles that chew holes in the leaves are a problem. Be sure to sow again in late summer for productive harvests in cool fall weather.
HARVEST AND USE
Harvest these sweet baby turnips from when they are as big as walnuts to when they are the size of ping-pong balls. If weather turns unexpectedly hot, pull and store the roots in the refrigerator. Turnips will be spicier in hot weather. Pearly white baby turnips are delicious sliced raw into green salads, or you can steam or sauté them briefly, or toss in oil and roast whole to bring out their natural sugars. Enjoy the tasty, nutritious green tops steamed or quickly braised.Regular price $4.69Sale price $4.69Unit price / per -
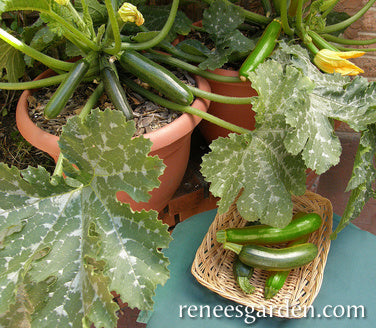
Container Zucchini Astia
START SEEDS OUTDOORS
Plant only when weather has warmed up and nights are above 50°F (10°C) Amend soil well with aged manure or compost. In a sunny spot, make slightly mounded hills, 3’ wide and 3’ apart. Sow seeds in a triangle on each mound, planting two seeds 1” deep at each point in the triangle. Thin to the strongest seedling at each point, leaving 3 seedlings per mound.
FOR CONTAINERS
Use fresh, good quality potting soil in containers. For a pot 15 in. across and 12 in. deep, sow 2-3 seeds in center. When seedlings reach 3-4 inches, remove all but 1 strong seedling. For pots 18-20 in. across and 12-15 in. deep, sow seeds 4 inches from container edges, then thin to 2 plants per pot. For larger pots, thin plants to be 8 in. apart. Mulch to help conserve moisture and fertilize monthly for good production. In hot weather, check and water containers daily.
GROWING NOTES
Protect seedlings from marauding birds with plastic berry baskets, removing before plants get crowded. Thin plants properly; you’ll get more zucchinis from a few well-spaced, healthy vines than from crowded plants that are much more disease prone.
HARVEST AND USE
Harvest at about 5 inches in length; frequent harvesting keeps plants producing. Enjoy these zucchinis grilled, baked sautéed or steamed. Try slicing lengthwise, drizzling with olive oil and roasting to succulent perfection. Or slice 1/2 inch thick, top with pizza sauce and cheese and bake.Regular price $4.99Sale price $4.99Unit price / per -
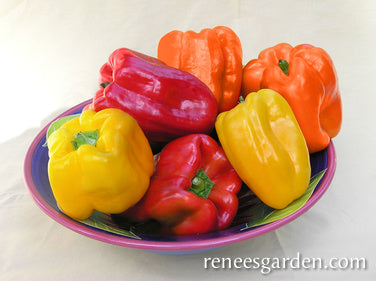
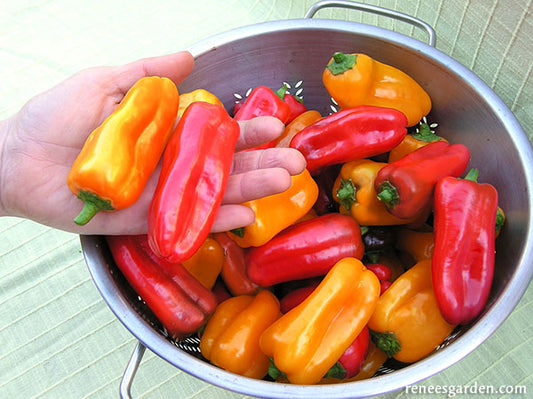
Jewel-Toned Bell Peppers Crimson, Gold & Orange
STARTING SEEDLINGS
In early spring, start indoors about 2 months before outdoor night temps are reliably in the 50-55°F (10-13°C) range. Sow seeds 1/4 inch deep and 1 inch apart in a container of starting mix. Keep moist but not soggy, and very warm, 80-85°F (27- 29°C). Provide a strong light source until seedlings are ready to plant outside.
When seedlings are 2 inches tall, transplant 2 inches apart into deeper containers or individual pots. Maintain at 70-75°F (21-24°C). Feed with half-strength fertilizer every 2 weeks until weather is warm enough to gradually acclimate seedlings to outdoor conditions. Plant out 2 1/2 feet apart into rich soil in full sun.
GROWING NOTES
Don’t plant peppers outdoors until night temperatures are above 55°F (13°C). Prepare soil with aged manure or compost. Plant only robust seedlings with well-developed roots. Mulch plants to maintain even soil moisture. Stake or cage your plants to help support their heavy fruit set.
HARVEST AND USE
Ready to pick in late summer, pepper fruits start out green and ripen up to rich red, orange or golden yellow, depending upon variety. Edible at any stage, glossy, fully colored fruits have the best flavor and are high in vitamins A and C. Carefully cut rather than pull peppers from plants. Enjoy these pretty peppers sliced up raw, sautéed, stir fried or grilled.Regular price $4.99Sale price $4.99Unit price / per -
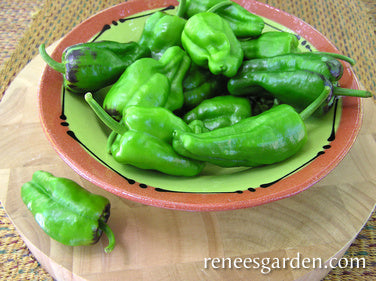
Tapas Peppers Spanish Padron
STARTING & GROWING
In early spring, start indoors 8 to 10 weeks before outdoor night temperatures are in the 55°F (13°C) range. Sow seeds 1/4 inch deep and 1 inch apart in a container of seed starting mix. Keep moist but not soggy, and very warm 75°F (24°C). Provide a strong light source until seedlings are ready to plant outside. When seedlings are 2 to 3 inches tall, transplant 3 inches apart into deeper containers. Maintain at 70°F (21°C). Feed with half-strength liquid fertilizer every 2 weeks. When weather is 55°F (13°C) both day and night, gradually acclimate seedlings to outdoor conditions. Transplant 1 1/2 feet apart into rich soil in full sun. Peppers need full sun at least 6 hours per day. Prepare soil well with aged manure or compost. Plant only robust seedlings with well-developed roots and mulch well to maintain even soil moisture. Water regularly and consistently and fertilize several times a month.
HARVESTING & PREPARING
For traditional Tapas, harvest the abundant little pointed fruits at no more than 2 inches long. At this small size, they are fragrant and flavorful; larger fruits get very spicy. To serve: Sauté the Tapas peppers quickly in a little hot olive oil just until the skins are glossy and slightly charred. To finish, sprinkle with coarse salt and enjoy while still hot. Most Padrons are mild, but occasionally one little pepper will have more spice — this is traditional and even sought after in Spain.Regular price $3.69Sale price $3.69Unit price / per -
Salad Scallions Delicious Duo
EASIEST TO START OUTDOORS
Plant scallions throughout the spring and again in mid to late summer for fall harvests. Sow seeds in well-worked, fertile soil in full sun. Space seeds 1 inch apart in rows 8 to 10 inches apart, or broadcast evenly for bed planting. Cover 1/2 inch deep and firm soil well over seeds. Be sure to keep soil evenly moist to ensure good germination.
THIN OR TRANSPLANT
Space 1 to 2 inches apart, allowing plants room to mature.
GROWING NOTES
Scallions take up little garden space, so tuck several rows around beds of lettuce, spinach or radishes. Make several plantings a month apart to have a constant supply for spring and summer meals. Prepare soil well with lots of aged manure or compost before planting. Keep evenly moist and weed carefully when plants are young. Mulching to conserve soil moisture and suppress weed growth is a good strategy.
HARVEST AND USE
To get the most out of your crop, start by using tender, mild-flavored early thinnings in salads, then continue thinning gradually so mature scallions stand an inch or two apart. These colorful scallions are best if harvested at 10 to 12 inches tall or before they send up bloom stalks, which makes the stems turn tough and too spicy.Regular price $3.99Sale price $3.99Unit price / per -
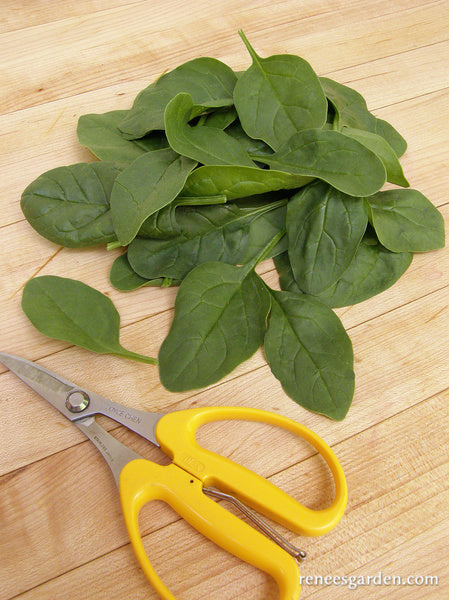
Baby Leaf Spinach Catalina
TO START OUTDOORS
In early spring when danger of hard frost is over, sow seeds in well-worked fertile soil in full sun. Space seeds 1 inch apart in rows 8 to 10 inches apart, or broadcast thinly for bed planting. Firm soil well over seeds to ensure good germination. If first sowing germinates unevenly, plant more seed as seedlings will catch up fast. Sow again in late summer.GROWING NOTES
Spinach is most productive in cool weather. Grow in cool spring conditions and sow again in late summer for a productive fall crop. After seedlings reach 2 to 3 inches tall, thin out every other plant (and enjoy in early salads) and keep thinning in this fashion until plants are spaced 5 or 6 inches apart.HARVEST AND USE
Either harvest individual outside leaves from well-established plants and let regrow, or harvest entire plants. Keep spinach plants well watered and weeded and fertilize these heavy feeders several times as they leaf out and especially after harvesting outside leaves. Combine well-washed and dried leaves with your favorite garlicky salad dressing; spinach pairs well with hearty dressings like the traditional hot bacon dressing. Good spinach salad additions include thinly sliced sweet red onions, sliced radishes, thin wedges of red apple or orange segments, toasted nutmeats, chopped scallions, crispy bacon bits, hard-cooked egg quarters and finely grated hard cheese.
Regular price $3.99Sale price $3.99Unit price / per -
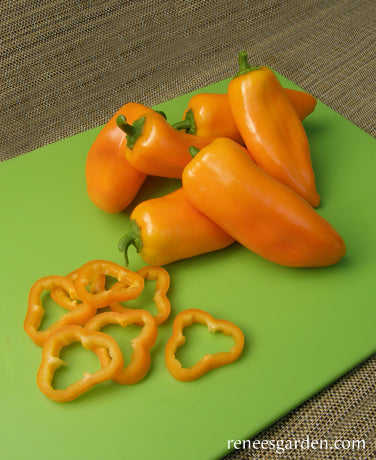
Baby Snack Peppers Yummy Belles
Vigorous Yummy Belle was bred in the Czech Republic by a fine family owned seed house that specializes in developing delicious peppers. The compact and productive plants load up early with sweet and crunchy, thick walled fruits that quickly ripen up bright orange for harvesting. You’ll have lots of plump and pretty 3 to 4 inch minis for fresh tasty snacks, to slice into salads, top pizza or enjoy in stir fries. These versatile little sweet peppers are real winners.
STARTING SEEDLINGS
In early spring, start indoors about 2 months before outdoor night temperatures are reliably in the 50-55°F (10-13°C) range. Sow seeds 1/4 inch deep and 1 inch apart in a container of starting mix. Keep moist but not soggy, and very warm 80-85°F (27-30°C). Provide a strong light source until seedlings are ready to plant outside. When seedlings are 2 inches tall, transplant into 4 inch individual pots. Maintain at 70-75°F (21-24°C). Feed with half strength fertilizer every 2 weeks until weather is warm enough to gradually acclimate seedlings to outdoor conditions. Plant out 2 to 2 1/2 feet apart into rich soil in full sun.
GROWING NOTES
Don’t plant peppers outdoors until night temperatures stay securely above 55°F (13°C). Prepare soil with aged manure or compost. Plant only robust seedlings with well-developed roots. Mulch plants to maintain even soil moisture. Stake or cage your pepper plants to support their heavy fruit set.
HARVEST AND USE
Pick the 3 to 4 inch peppers when fully colored up orange. Cut rather than pull them from plants. Enjoy them sliced up raw, sautéed, stir fried, grilled or piled on pizza.Regular price $3.69Sale price $3.69Unit price / per -
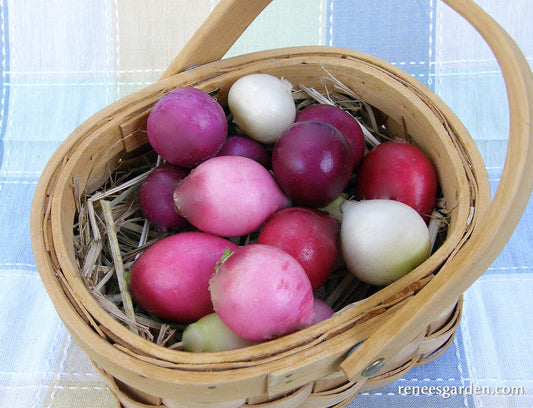
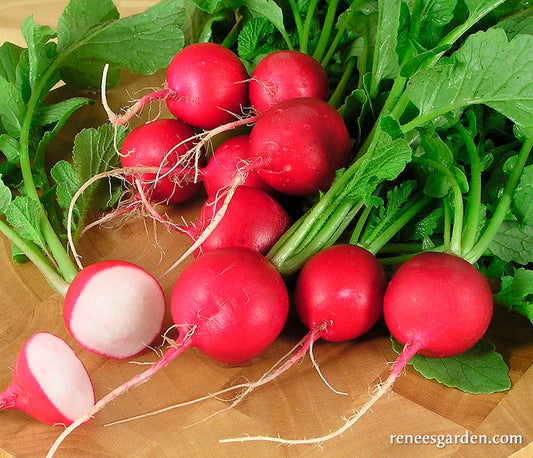
Rainbow Radishes Easter Egg II
START SEEDS OUTDOORS
In early spring as soon as ground can be worked, sow radish seeds in well-worked, fertile soil in full sun. Space seeds 1 inch apart in wide rows 6 inches apart. Keep soil evenly moist and well weeded. If first sowing comes up unevenly, replant right away. Sow in late summer for a fall crop.
GROWING NOTES
Sow this quick growing, cool season crop wherever you intend to plant heat lovers later. Radishes thrive and have crisp flesh and the best mild flavor given consistent moisture. Sow small amounts a week apart to mature before or after summer heat. Thin quick-growing seedlings early to 2 inches apart so roots have room to size up. Protect radishes with floating row covers if marauding birds or flea beetles that chew holes in the leaves are a problem.
HARVEST AND USE
Harvest radishes when roots are the size of large marbles. If weather turns unexpectedly hot, pull, cut off tops, and store in the refrigerator for up to 3 weeks. Radishes will be spicier in hot weather and milder grown in cooler conditions. Combine sliced radishes, scallions and fresh dill or parsley for a great salad. Make delicious open faced sandwiches on whole grain bread spread with sweet butter and topped with sliced radishes.Regular price $3.39Sale price $3.39Unit price / per -
Mini Snack/Salad Peppers Baby Belle
STARTING SEEDLINGS
In early spring, start indoors about 2 months before outdoor night temperatures are reliably in the 50-55°F (10-13°C) range. Sow seeds ¼ inch deep and 1 inch apart in a container of starting mix. Keep moist but not soggy, and very warm 80-85°F (27-30°C). Provide a strong light source until seedlings are ready to plant outside.
When seedlings are 2 inches tall, transplant into 4 inch individual pots. Maintain at 70-75°F (21-24°C). Feed with half-strength fertilizer every 2 weeks until weather is warm enough to gradually acclimate seedlings to outdoor conditions. Plant out 2 to 2½ feet apart into rich soil in full sun.
GROWING NOTES
Don’t plant peppers outdoors until night temperatures stay securely above 55°F (13°C). Prepare soil with aged manure or compost. Plant only robust seedlings with well-developed roots. Mulch plants to maintain even soil moisture. Stake or cage your pepper plants to support their heavy fruit set.
HARVEST AND USE
Pick the 3 to 4 inch peppers when fully colored up. Cut rather than pull them from plants. Enjoy them sliced up raw, sautéed, stirfried, grilled or piled on pizza.Regular price $3.99Sale price $3.99Unit price / per -
Round Red Radishes Crimson Crunch
START SEEDS OUTDOORS
In early spring as soon as ground can be worked, sow radish seeds in well-worked, fertile soil in full sun. Space seeds 1 inch apart in wide rows 6 inches apart. Cover 1/2 inch deep. Keep soil evenly moist and well weeded. If first sowing comes up unevenly, replant right away. Sow in late summer for a fall crop.
GROWING NOTES
Sow this quick growing, cool season crop wherever you intend to plant heat lovers later. Radishes thrive and have crisp flesh and the best mild flavor given consistent moisture. Sow small amounts a week apart to mature in warm but not hot weather. Thin quick-growing seedlings early to 2 inches apart so roots have room to size up. Protect radishes with floating row covers if marauding birds or flea beetles that chew holes in the leaves are a problem.
HARVEST AND USE
Harvest radishes when roots are the size of large marbles. If weather turns unexpectedly hot, pull, cut off tops, and store in the refrigerator for up to 3 weeks. Radishes will be spicier in hot weather and milder grown in cooler conditions. Combine sliced radishes, scallions and fresh dill or parsley for a great salad. Make delicious openfaced sandwiches on whole grain bread spread with sweet butter and topped with sliced radishes.
Regular price $3.99Sale price $3.99Unit price / per -
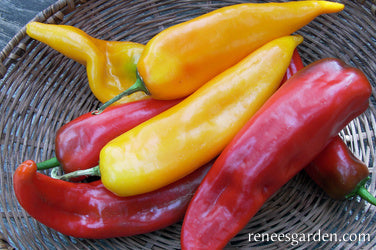
Italian Roasting Peppers Corno di Toro Mix
STARTING SEEDLINGS
In early spring, start indoors about 2 months before night temperatures stay above 50-55°F (10-13°C). Sow seeds 1/4 inch deep and 1 inch apart in a container of seed starting mix. Keep moist but not soggy, and very warm 80-85°F (27-29°C). Provide a strong light source until seedlings are ready to plant outside. When 2 inches tall, transplant 3 inches apart into deeper containers. Maintain at 70-75°F (21-24°C). Feed with half strength fertilizer every week until weather is warm enough to gradually acclimate seedlings to outdoor conditions. Transplant 2 feet apart into rich soil in full sun.
GROWING NOTES
Don’t transplant outdoors until nights are above 50°F (10°C). Prepare soil well with aged manure or compost. Plant only robust seedlings with well-developed roots. Mulch plants to maintain even soil moisture.
GROWING & HARVEST
Peppers need full sun at least 6 hours per day. Mulch well to maintain even moisture. Fertilize weekly to establish vigorous plants that provide shade and protect fruit from sunburn. Plants must be staked or caged to keep branches from breaking under their heavy fruit set. Harvest when fruits are glossy and turn from green to fully red or yellow by cutting, not pulling from plants. Eat fresh, roast or grill or try them Italian style, sautéed with tomatoes, olive oil, garlic and basil, accompanied by good hard cheese and crusty bread.
Regular price $3.69Sale price $3.69Unit price / per -
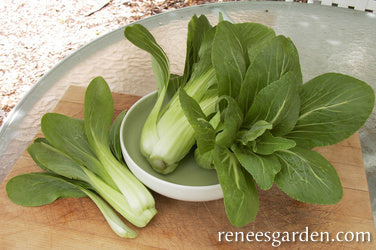
Baby Pak Choi Green Fortune
TO START OUTDOORS
In very early spring as soon as ground can be worked, prepare a well-drained, fertile garden bed in full sun. Sow seeds 2 inches apart in rows spaced 6 to 8 inches apart. Cover 1/4 inch deep and keep soil evenly moist to ensure good germination. Sow again in late summer for another fast growing crop.
TO START INDOORS
Sow seeds in a container of seed starting mix 2 inches apart and cover 1/4 inch deep. Keep moist and provide a strong light source until seedlings are about 3 inches tall and ready to plant in the garden.
THIN OR TRANSPLANT
Space seedlings 5 to 6 inches apart to give plants room to mature.
GROWING NOTES
Pak Choi thrives in rich soil and cool growing conditions. Be sure to thin seedlings and keep well weeded and watered for best tasting crunchy heads. Feed 2 or 3 times during the growing season with fish emulsion or another high nitrogen fertilizer.
HARVEST AND USE
Use early thinnings in salads. Cut whole vase-shaped little heads when they are plump and well filled out. Chop coarsely for delicious quick stir fries, or braise in a little butter and broth just until tender-crisp. Green Fortune is mild and sweet tasting and chock full of vitamins and antioxidants.
Regular price $3.99Sale price $3.99Unit price / per

